HOW TO SET UP + BLOCK IN YOUR URBAN SKETCH
And not in that passive, scroll-past-it kind of way.
I mean really seeing.
That’s why I urban sketch.
Not for perfection. Not for portfolio pieces. But to train my eye.
To understand perspective not as a theory, but as a living thing something I can feel when I sit on a curb and draw what’s right in front of me.
Urban sketching is fast, messy, and totally freeing. I set a timer. I let go of details. I draw only what speaks to me.
And I block it in first because even the loosest sketch needs a skeleton.
If you’ve ever sat down with a sketchbook and thought, Where do I even start?, this is for you.
Here’s how I block in my urban sketches before I let the fun, flowy stuff take over.
Step 1: Decide on Your Perspective
Before you put pencil to paper, take a breath and ask: Am I seeing this straight on (1-point perspective)? Or do I see two sides of the structure (2-point perspective)?
You’ll want to know this because it determines everything else, angles, lines, where your eye lands. For this example, we’re sticking with 1-point. It’s simple, powerful, and a great place to start.
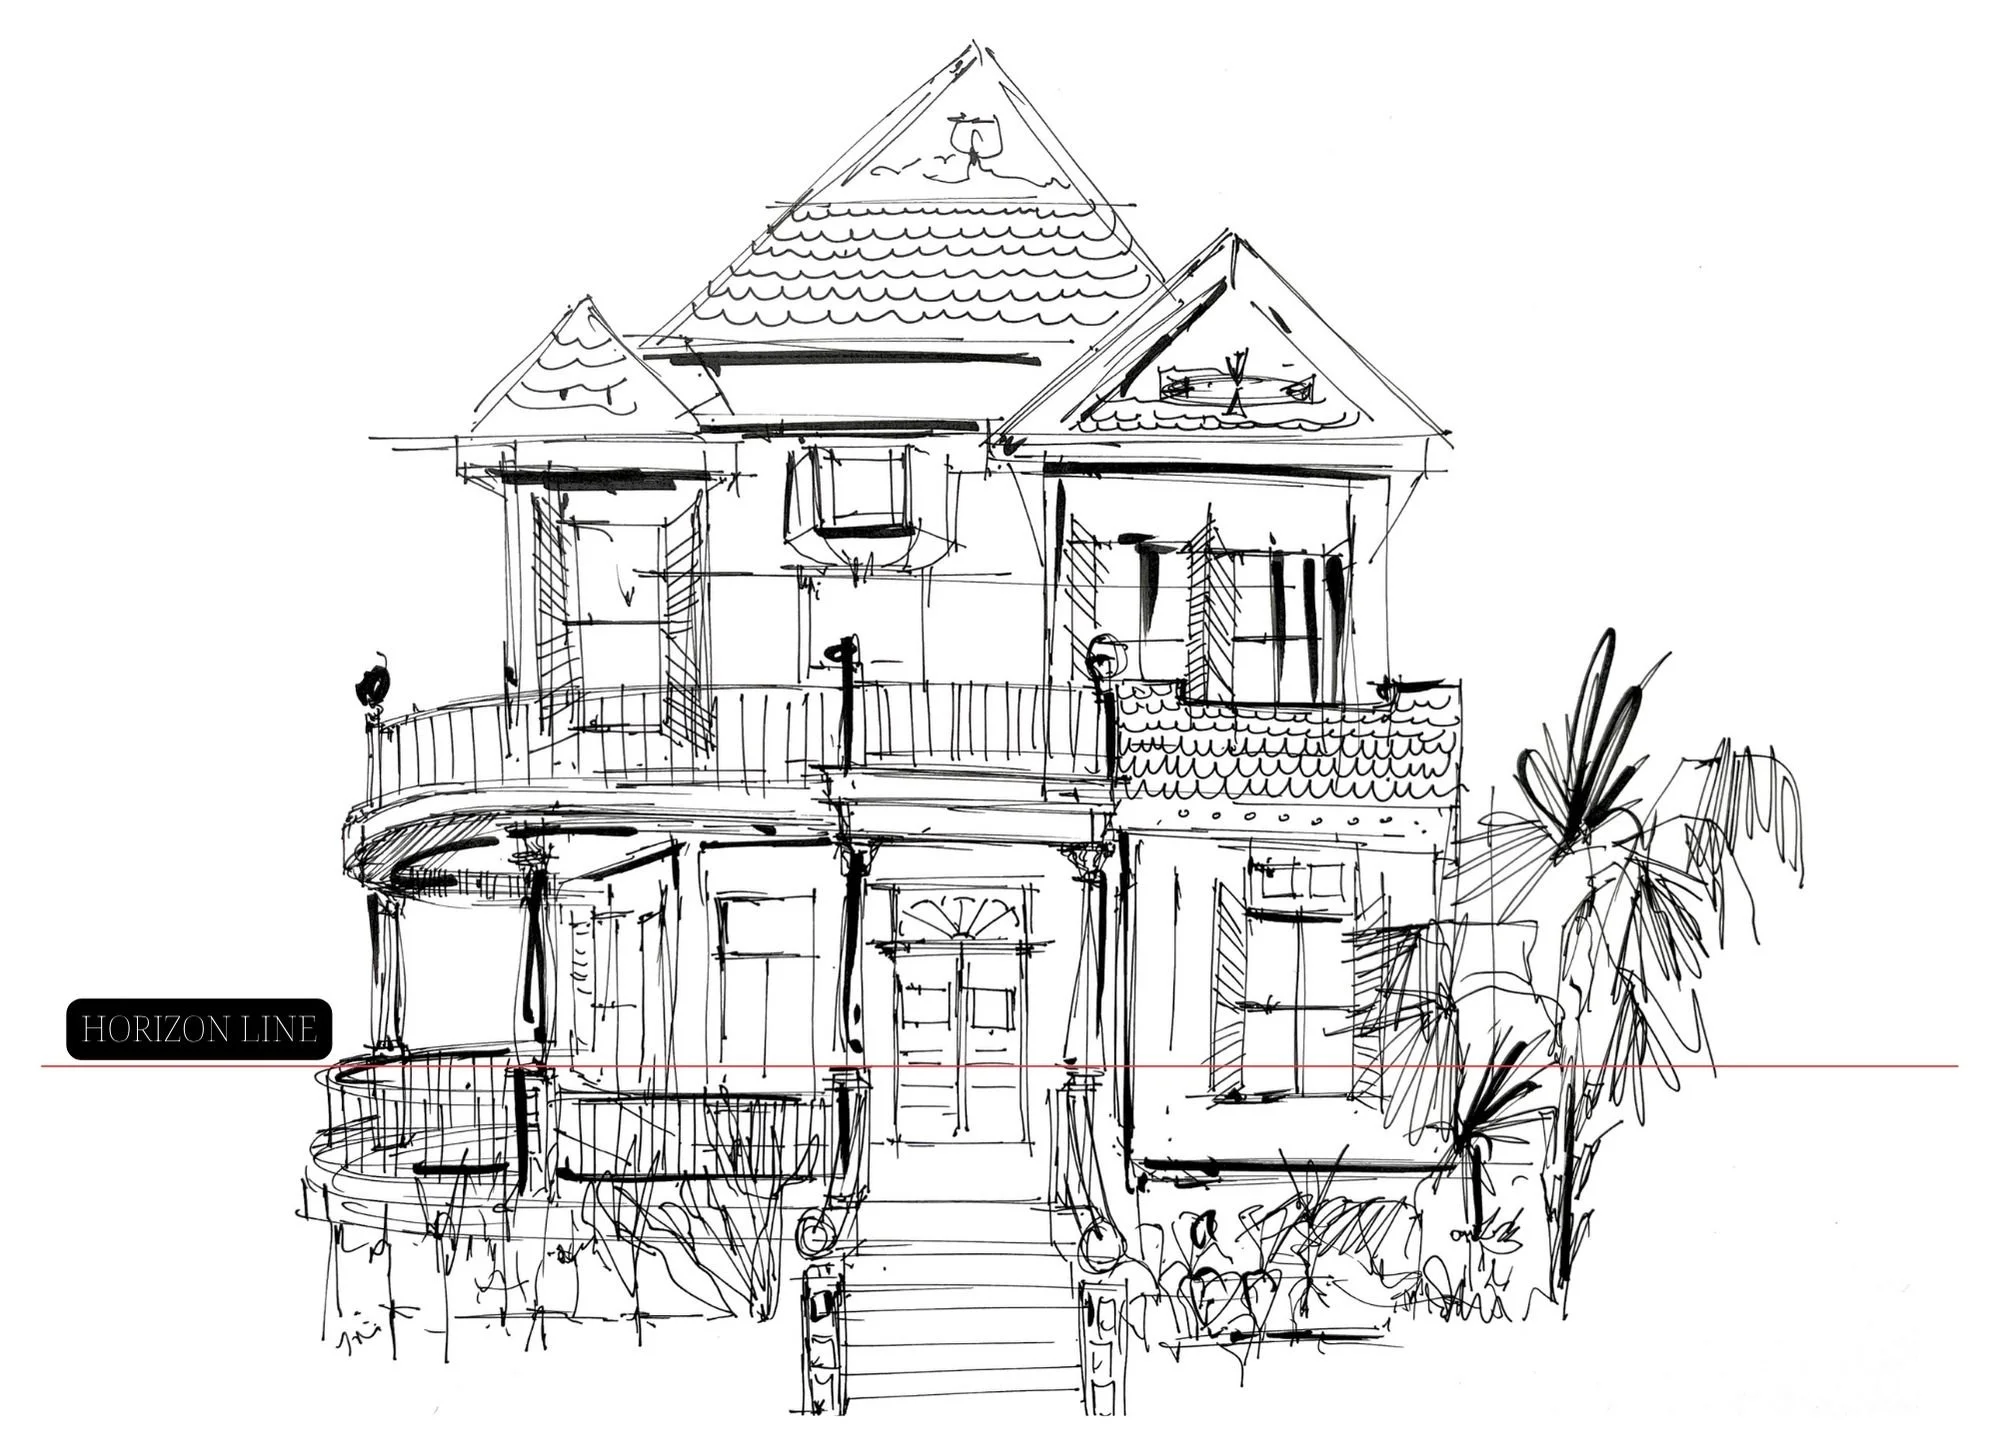
Step 2: Find Your Horizon Line (HL)
This is your eye level, literally. Look straight ahead. Wherever your eyes naturally land, that’s your horizon line.
Mark it on your page.
This line helps ground your drawing and keeps your perspective accurate. Think of it as your sketch’s spine. Without it, things can get wobbly fast.
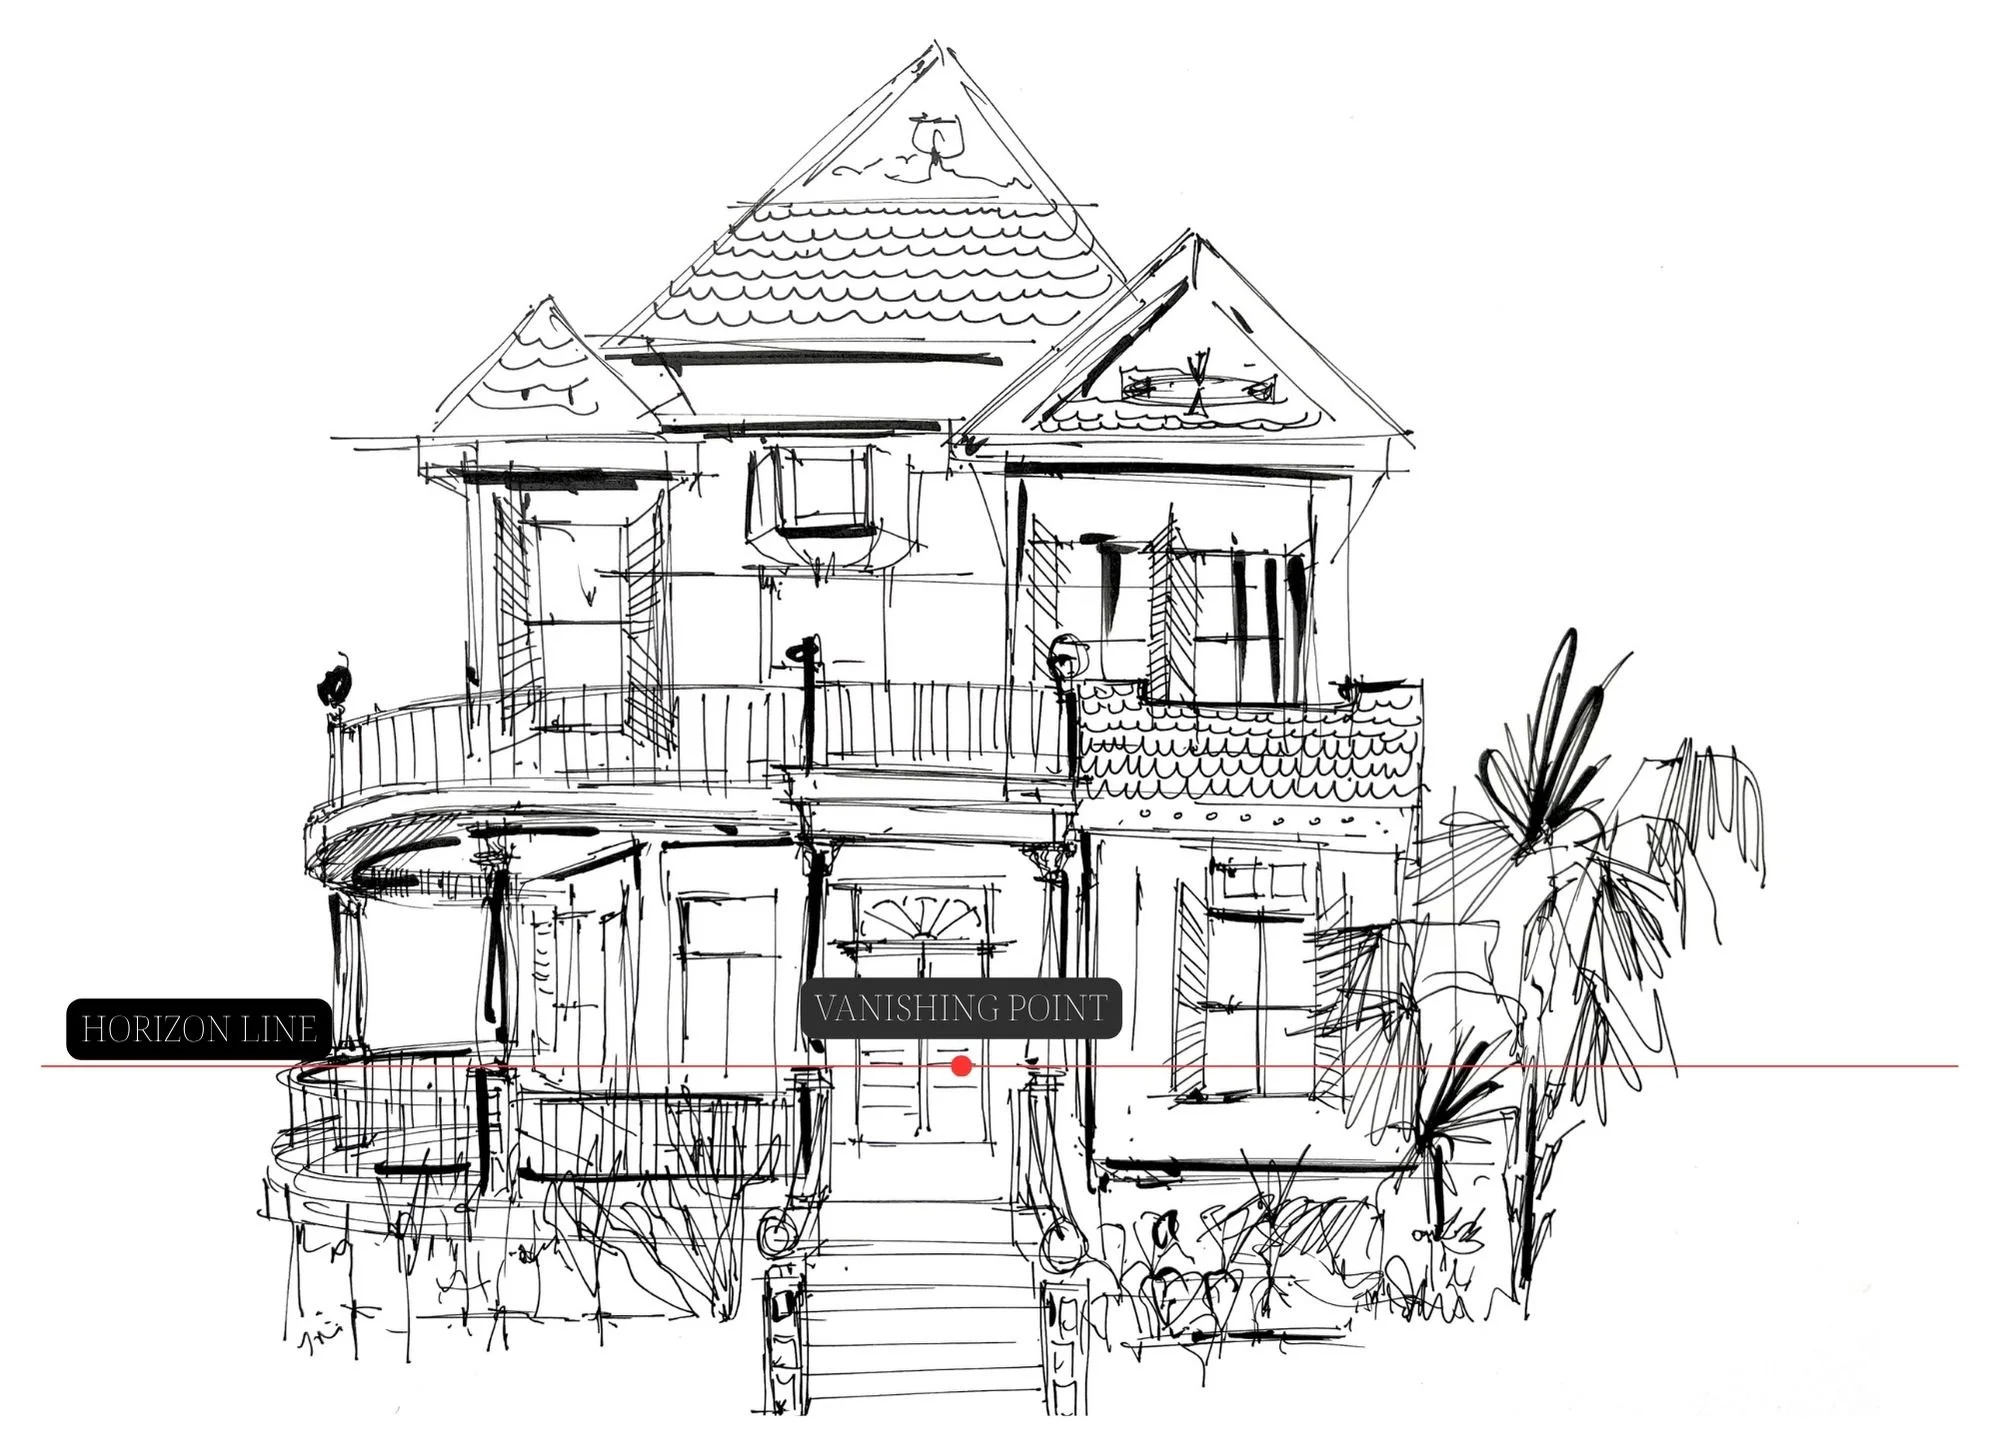
Step 3: Mark Your Vanishing Point (VP)
Since we’re using 1-point perspective, you only need one vanishing point.
Ask yourself: What’s directly in front of me?
Stretch you arm out directly in front of you and point your finger straight to the VP.
That’s your VP.
Find it. Mark it on the horizon line. That little dot is where everything converges. Rooflines, porches, sidewalks, all those lines are headed there.
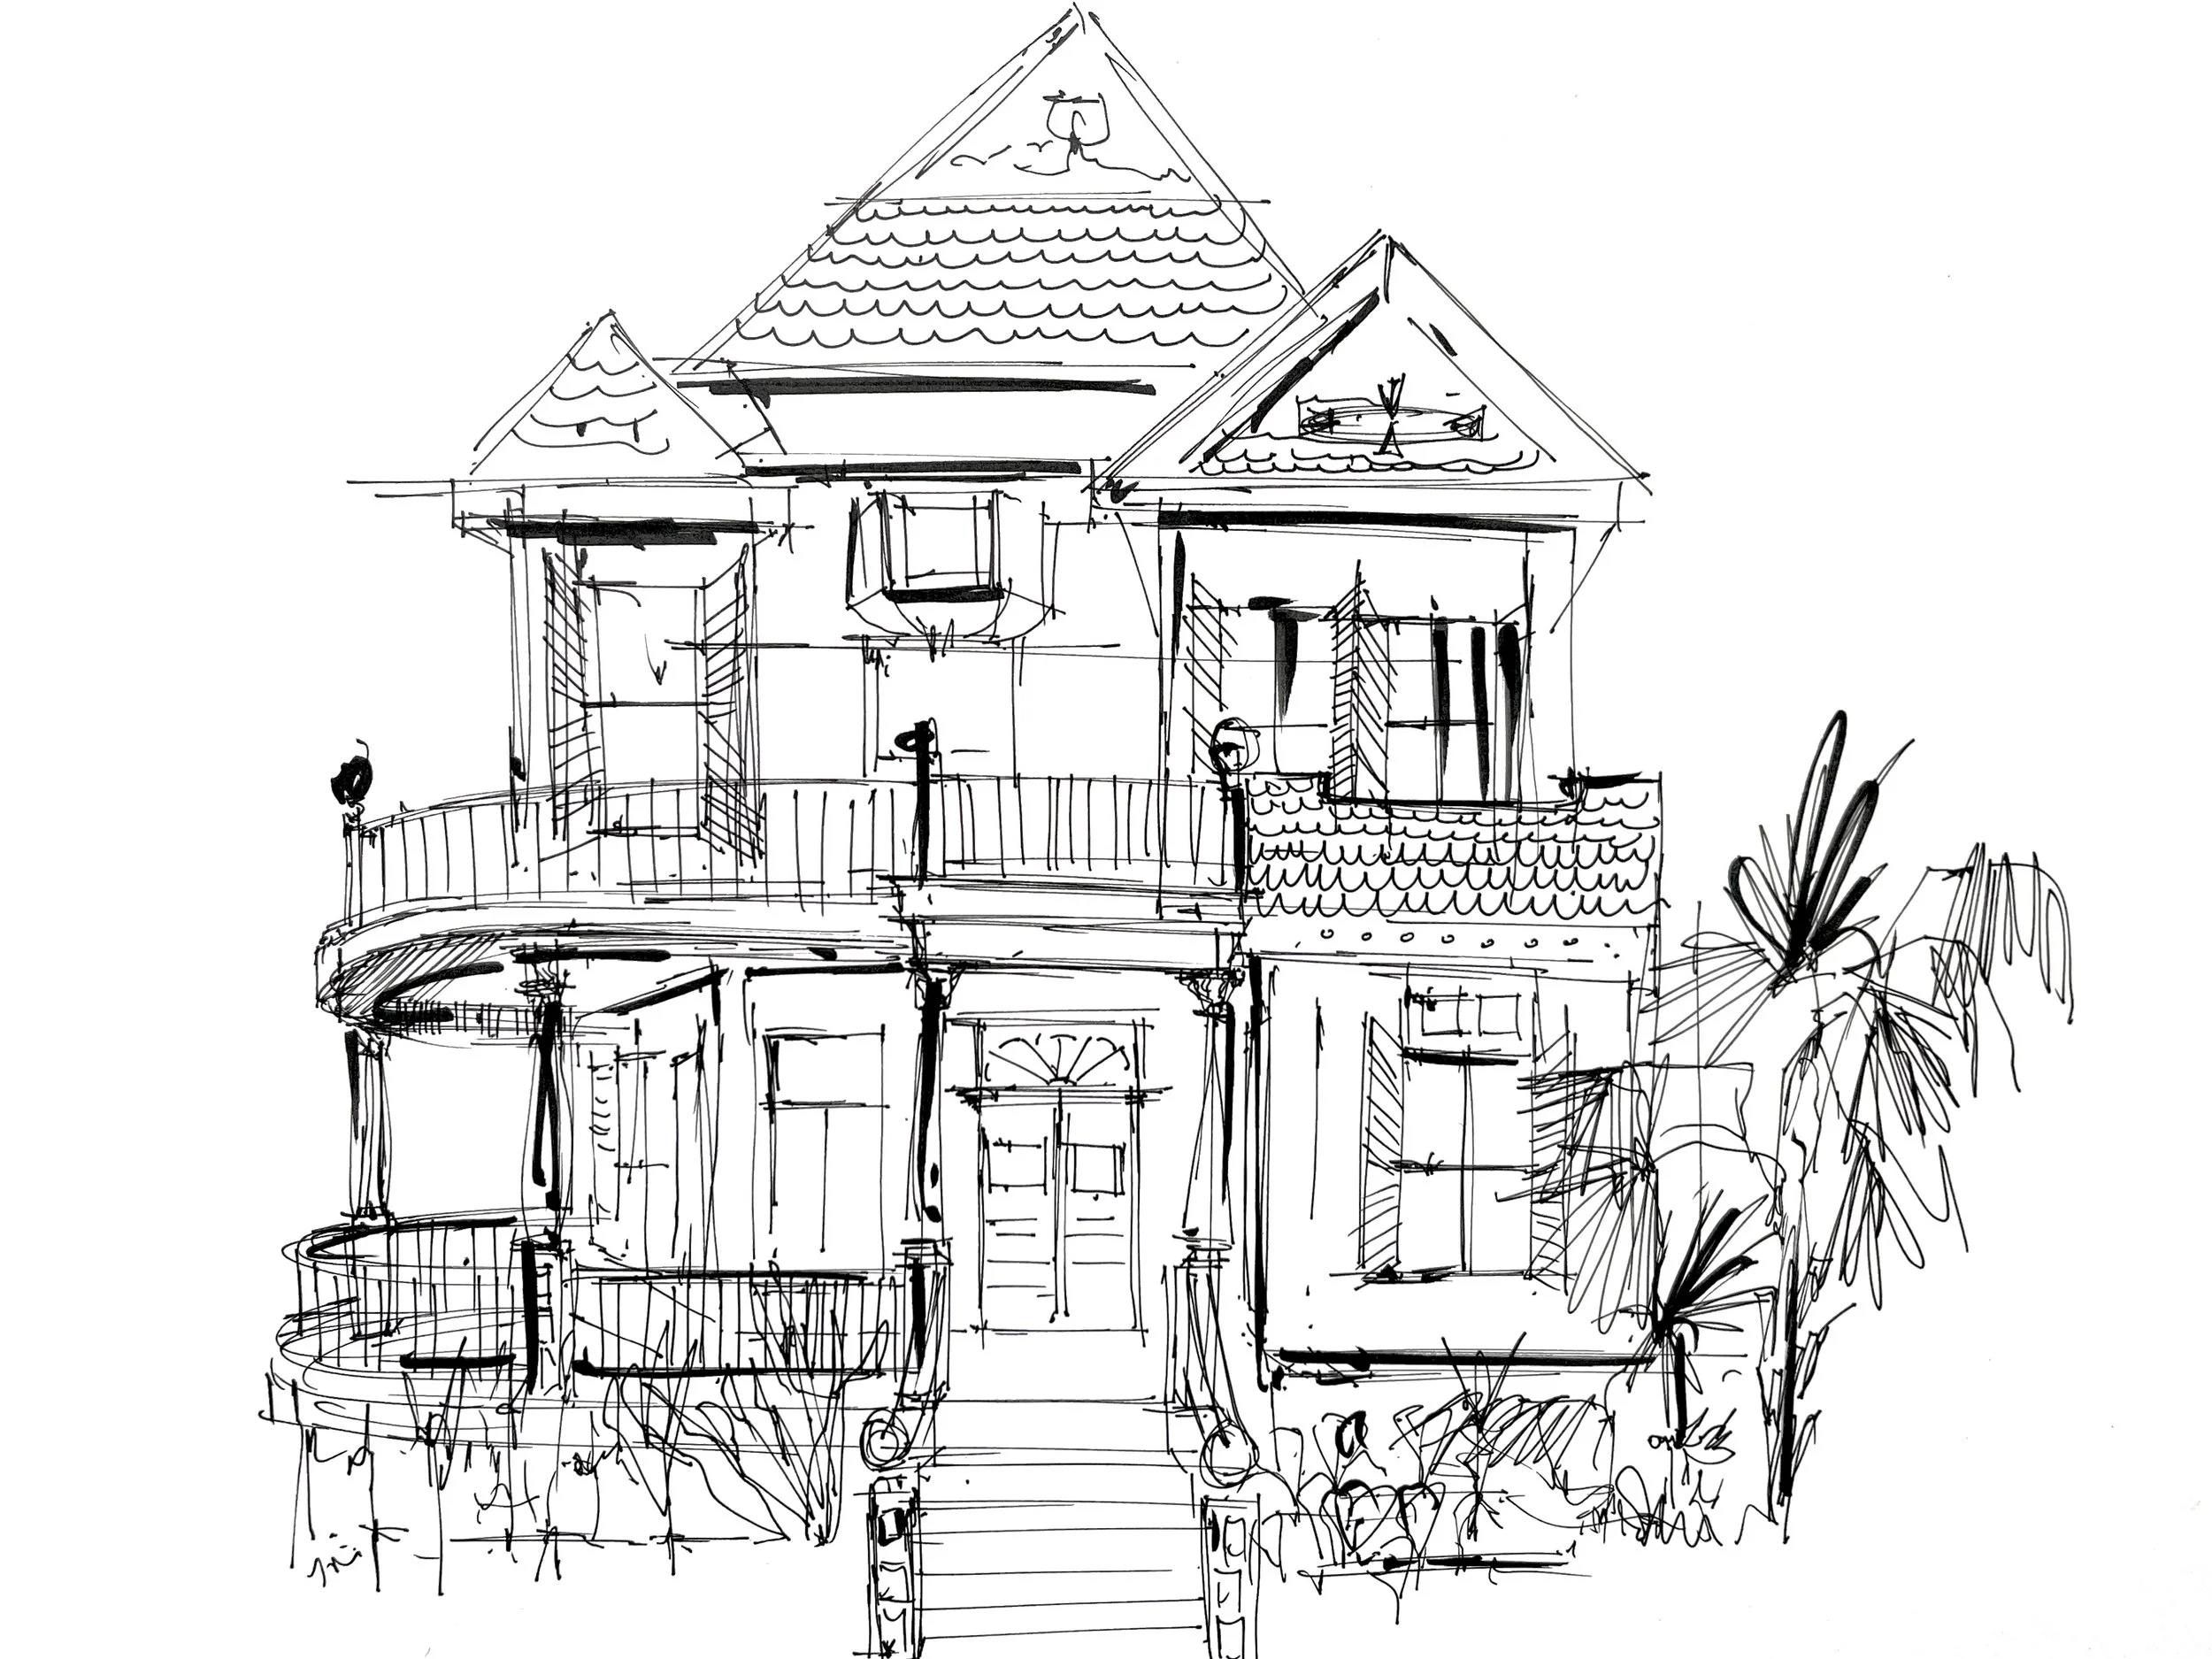
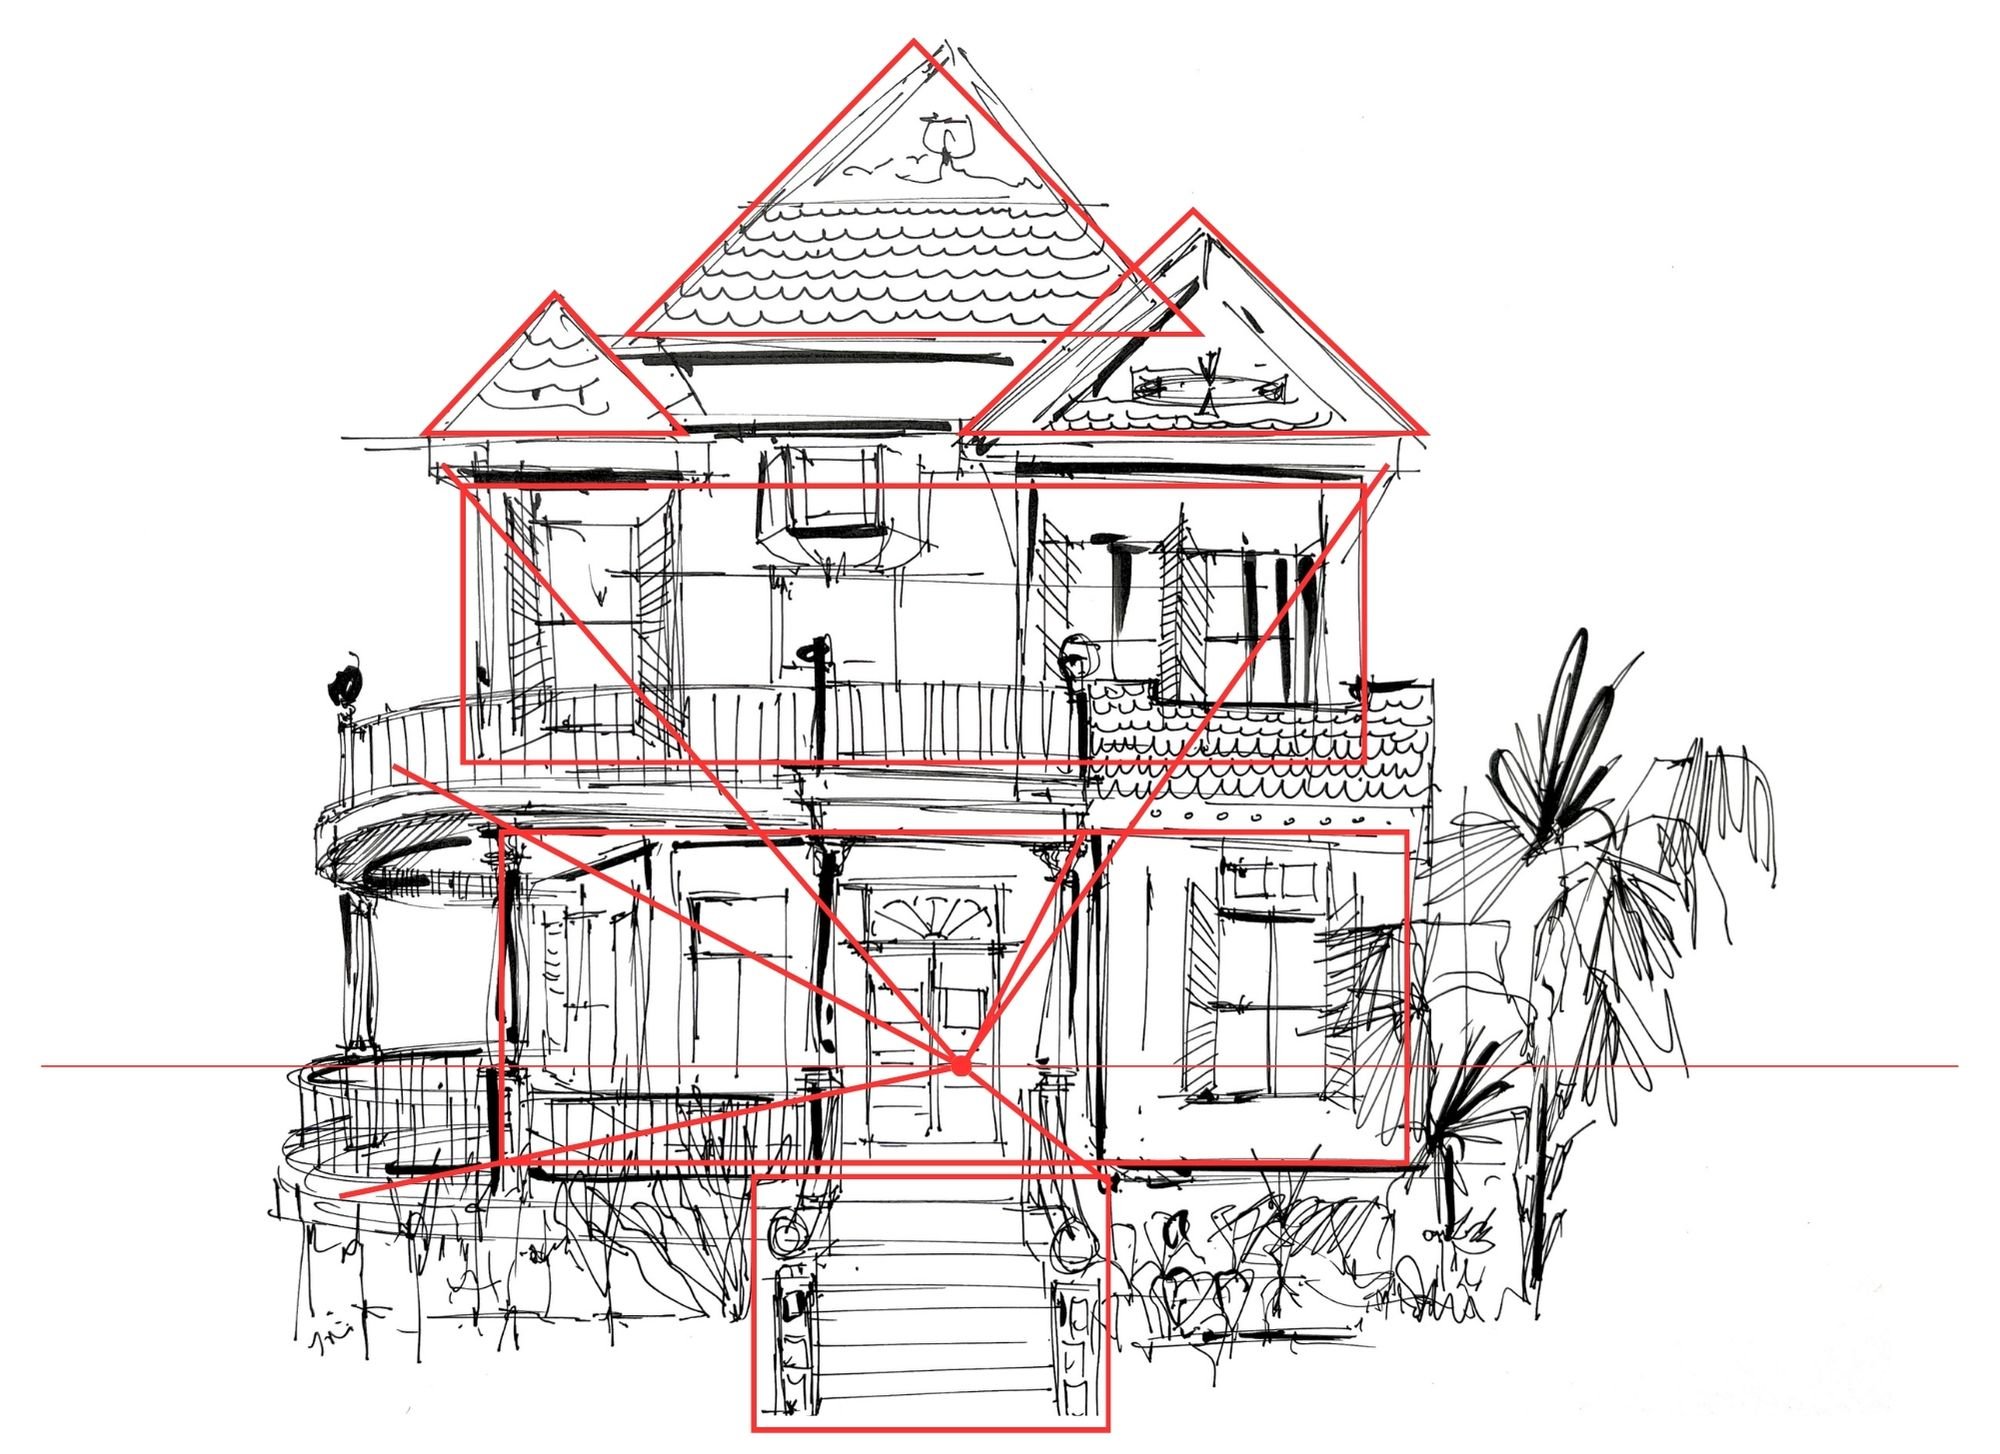
Step 4: See the Shapes, Not the Details
Forget about “houses” or “porches” or “windows.” Look at what’s actually there.
See rectangles. Squares. Triangles. Geometry is everywhere.
That house? A big rectangle. That porch? Another rectangle. The roof? A slanted one on top.
When you start seeing the world as shapes instead of objects, the whole thing becomes way less intimidating. You’re not drawing a house. You’re drawing shapes in space.
Lightly block them in with a pen, don’t use a pencil.

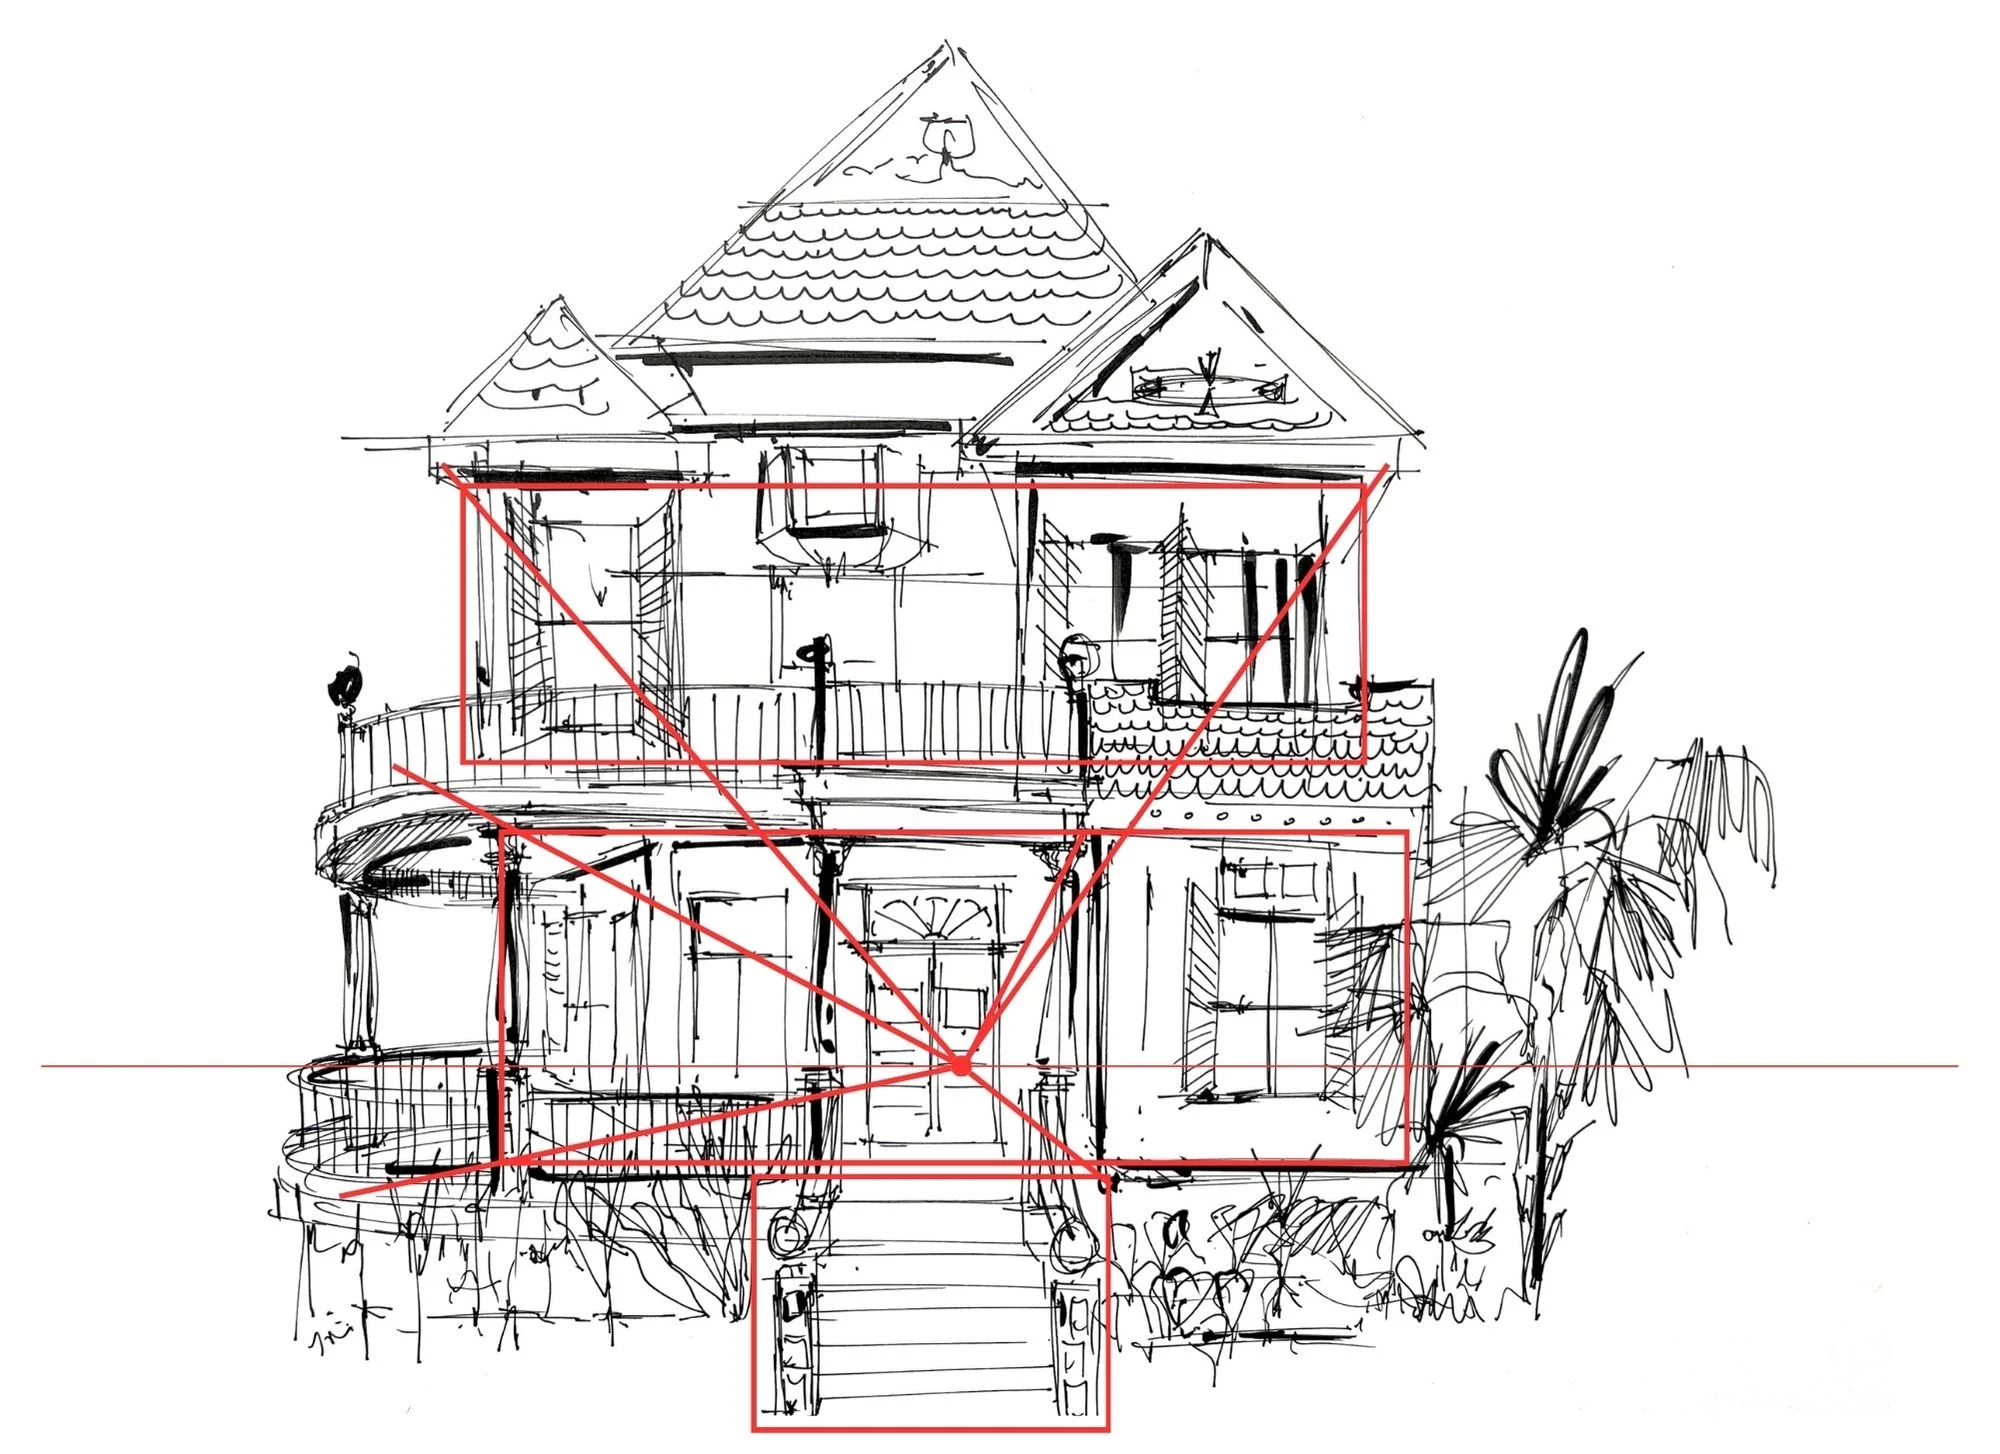
Step 5: Start Converging Your Lines
This is where it starts to feel like magic.
Take those roof edges, porch lines, window sills, anything that moves away from you, and angle them back to your vanishing point. That’s perspective doing its job.
If this part feels tricky or you want a deeper dive, I teach all of this step-by-step inside our class, The Sketch Masterclass. We break down both 1-point and 2-point perspective so it actually clicks and you can sketch with confidence wherever you are.
Step 6: Add Your Roof Pitch
This is the top triangle on your structure. Match it to what you see in real life. Is it steep? Subtle? Symmetrical?
Don’t overthink it. Just sketch what’s actually there, not what you think a roof “should” look like.
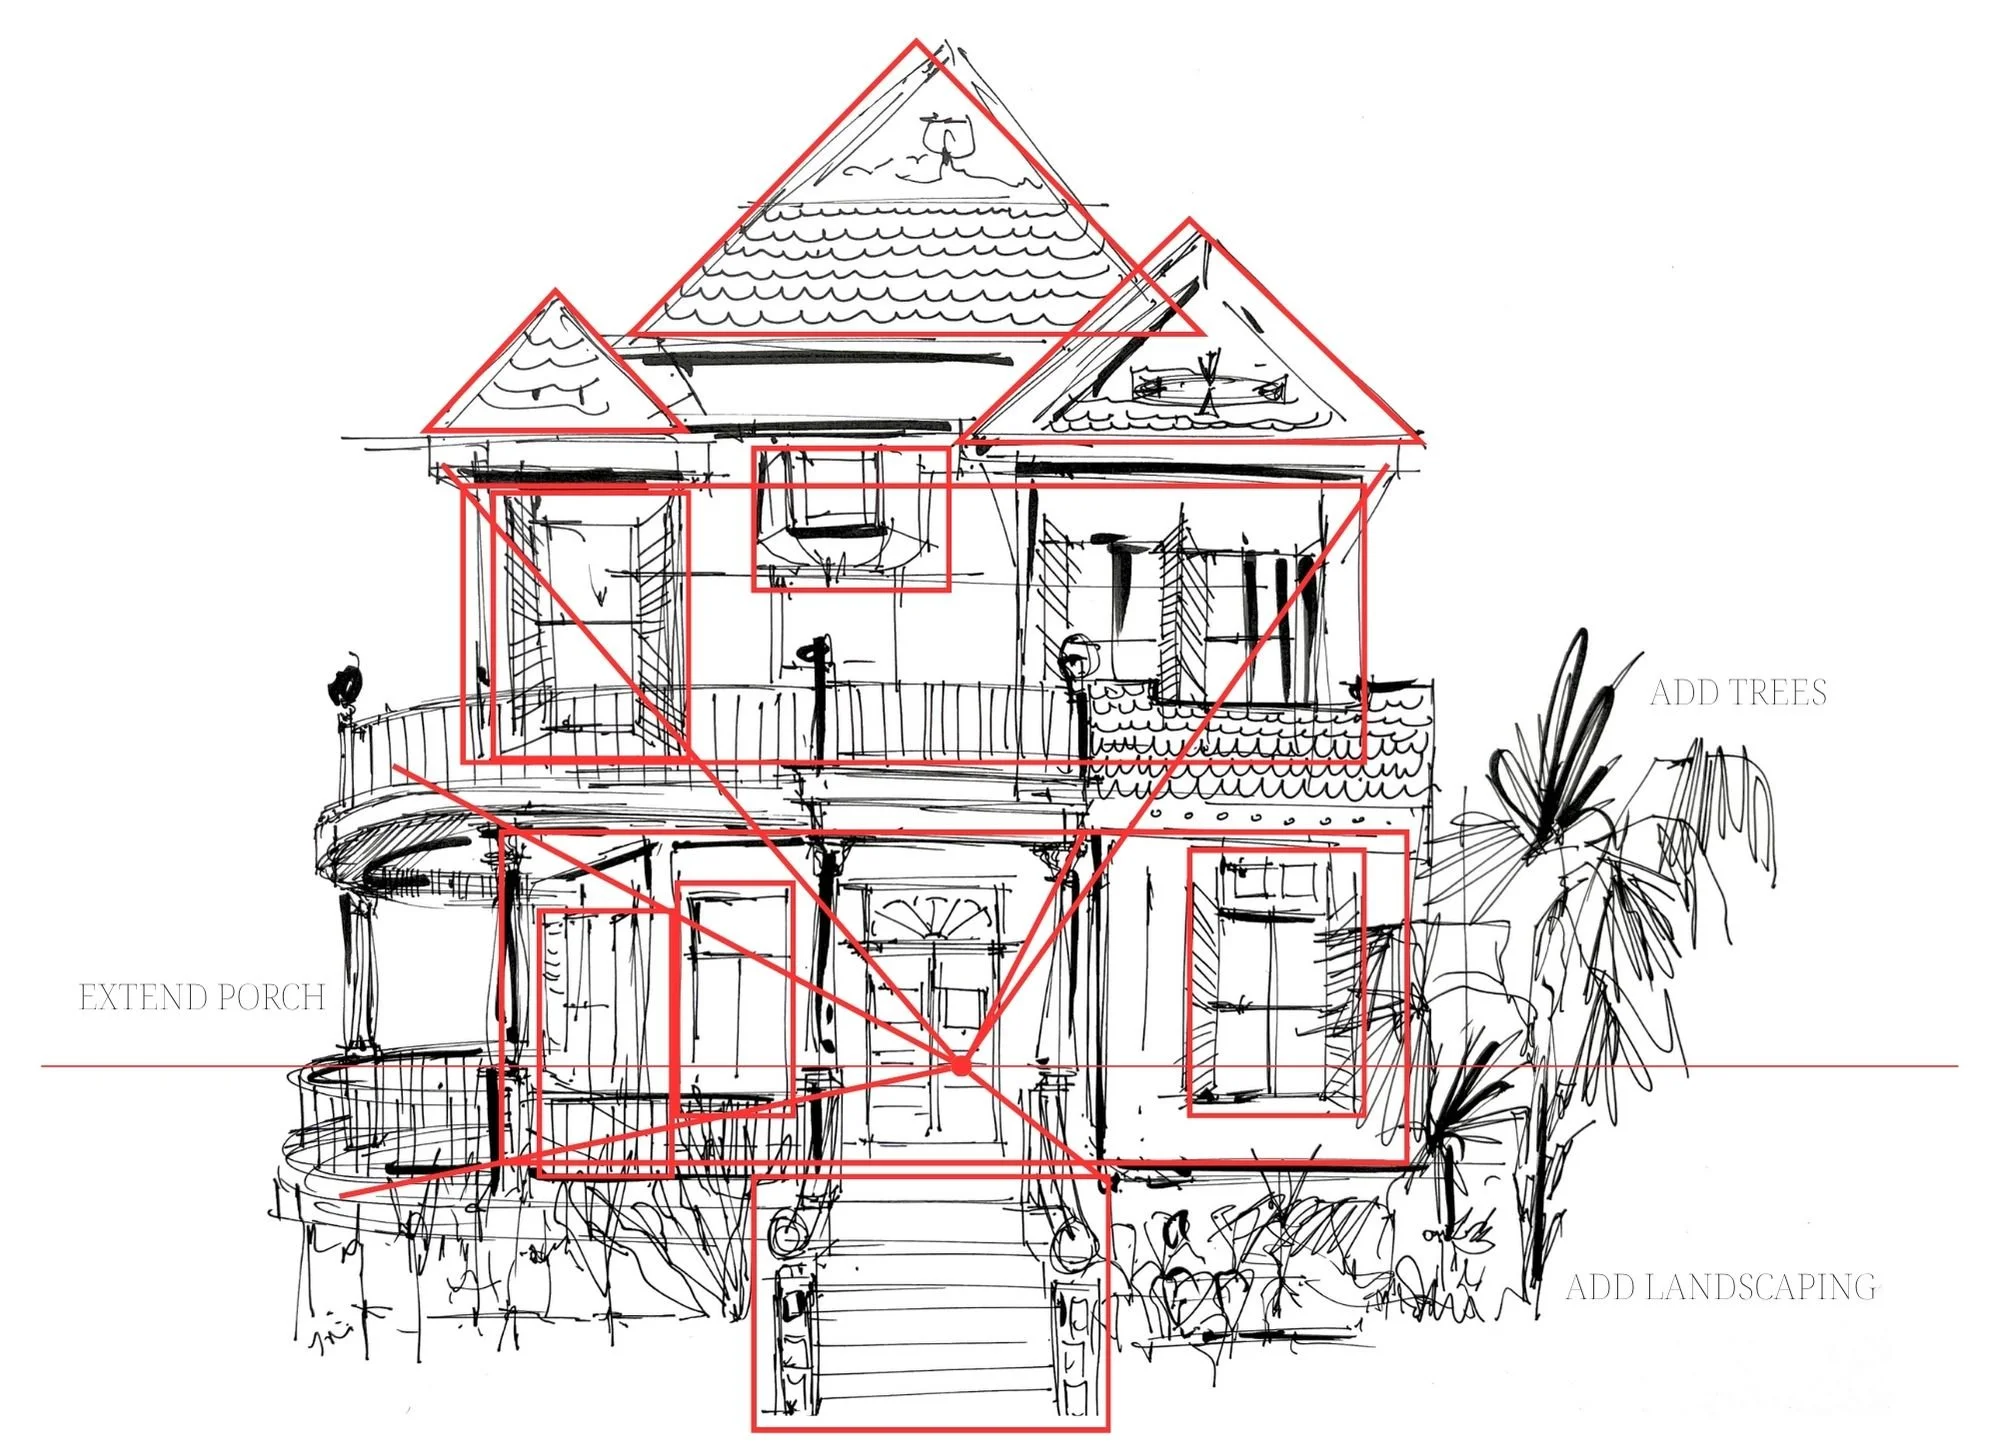
Step 7: Add Final Details (Only the Ones You Want)
Here’s where you make it yours.
Doors. Windows. Trim. Flower boxes. Chimneys. Light fixtures.
But here’s the thing, you don’t have to add them all.
Sometimes I do. Sometimes I don’t. I usually skip bricks and siding because they take too long and make the sketch feel busy. That’s just my style. You get to choose your own.
That’s the whole point.
Final Thoughts
Urban sketching isn’t about precision. It’s about presence.
It’s about training your eye to really see what’s in front of you, and letting your hand follow. It’s about the smells in the air, the strangers who stop to peek over your shoulder, the way you remember that corner café better because you drew it.
You’re the artist. You get to decide what to include, and what to leave out.
Just start with a block-in. Set your shapes. Find your vanishing point. Then let the sketch take you somewhere new.
If you want help learning perspective from scratch, or you’re ready to actually feel confident sketching in the wild, THE SKETCH MASTERCLASS is where I teach it all, step-by-step.
Because your ideas deserve to be seen. And this is one beautiful way to start.